Showing posts with label Memory Box Dies. Show all posts

Tuesday, January 5, 2016

SCS Hope You Can Cling To Challenge Cards from October 2015

I can't seem to get up from my computer at the moment so I might as well post some more while I'm here!  I could be working on a card right now, ha, or reading a book, hmmm, but nahhhh, let's post some more cards!  Here's a collection of cards I made for some of the October HYCCT challenges on Splitcoast Stampers. This is done in honor of Breast Cancer Awareness and we send the cards to MD Anderson in Texas where they make them available to patients and their family members to send or give out.

There were 40 challenges this year!  I didn't get all of them done for the month but I did have some fun with a few.  I always look forward to this event every October.  It seems to jump start my creativity after months of not making anything, just in time to think about & make holiday cards.  On to the cards!!


Challenge: Stop & Smell the Roses - use roses.  
Stamps: Close to my Heart-Floral Happiness    Ink & Paper: Stampin'Up!  
Other: Misti, scissors to fussy cut, foam tape to pop up flowers, glue


Challenge: Finish Line - include a hand draw a line & have something crossing it
Stamps: Sweet n' Sassy Stamps-Cute Critters   Paper: DCWV   Ink: Versafine, Tombow markers  
Other: pen & ruler to draw finish line and border around sentiment
Teehee, I cracked myself up with this one, thanks to SNSS critters.  Hopefully some little boy will enjoy this. : )


Challenge: use the Wrinkle Free Distress technique
Inks: TH Distress Ink pads    Paper: Shimmer paper for die cuts
Other:  Taylored Expressions-Silhouette Stems 3 die, Memory Box-Sketchbook Love die

I smeared a stripe for each of 3 color pads onto my craft mat, spritzed it with a water mister then swiped the paper thru it a few times to pick up the ink creating a background.  I could keep doing this, it was fun!


Challenge: Strengthen the designer paper - embellishing it.  
Paper: DCWV-Cafe Mediterranean   Other: McGill Tag punch, Taylored Expressions-Hello die, brad, 
Sakura Stardust pen (used on white flowers), foam tape
I cut out spare flowers and popped a few of them up on the background (white) and glued some of the blue flowers to the tag : )


Challenge: Strength in Numbers-use masking technique to make a group of people or animals
Stamps: Great Impressions-Fish (single fish with air bubbles), Hero Arts-sentiment
Ink: Versafine, Tombow markers  Other: Spellbinders Rectangle die, Clear window plastic (fish tank window), 
Stamp-a-ma-jig (to make a pool of fish with one fish)!


Challenge: Pretty Tattoo - use image and or words that would make a pretty tattoo
Stamps: Misty Mountain Rubber Stamps-flower, Art Impressions-sentiment    Ink: Versafine, Tombow markers  
Other: CB Distressed Stripes EF, foam tape


Challenge: Create a cure - make a colorful background using the Salting Technique
Stamp: Hero Arts-sentiment  Inks: Versafine, Artist's Loft pearlescent watercolors  Paper: DCWV, Shimmer paper for die cut, Watercolor paper for background   Other: Spellbinders-Butterfly Magic die, Kosher salt,  water mister

I didn't get the paints very wet so I had to mist the paper well before shaking the salt onto it.  The salt absorbs the water (thus some color) leaving a speckled background.  I really did not like this background using the pearlescent wc paint but I couldn't find my other watercolors and I didn't have time to play with this technique more before the challenge period ended.  I tried to pretty it up using the die cut. : )


Challenge:  I am a warrior - create a card that shows strength or inspiration
Stamps: Our Daily Bread Designs-Keep Climbing & Mountain sets  Ink: Versafine-black & blue, Memento-brown
Basic, but colorful with the layering, inspiring, may be masculine tho I wouldn't mind receiving it. :)


Challenge: split the difference- make full card front and split it with a sentiment strip.
Stamp: Stampendous  Ink: Versafine  Other: Memory Box - Reverse Butterfly Collage, Faber-Castell Gelatos & water, 
Perfect Pearls mist (to perk up the otherwise stark black background!)
I love this Reverse Butterfly Collage die, so much easier to adhere down than the intricate butterfly die I used on another card (below)!  The sentiment I cut by hand into a banner of sorts.  I didn't want to cover too much of that background. :)


Challenge: Thank Pink - make a pink thank you card
Stamp: SU Vivid Greetings  Ink: SU  Other: Memory Box-Fancy Blossoms flower die, Stickles, foam tape


Challenge: Orange you glad...? Make a card using Orange 
Paper: Core'dinations  Dies: Taylored Expressions - Curly Swirlies, Little Yellow Bicycle-Hope
Hmm, I should use orange more often, I think I like it. : )
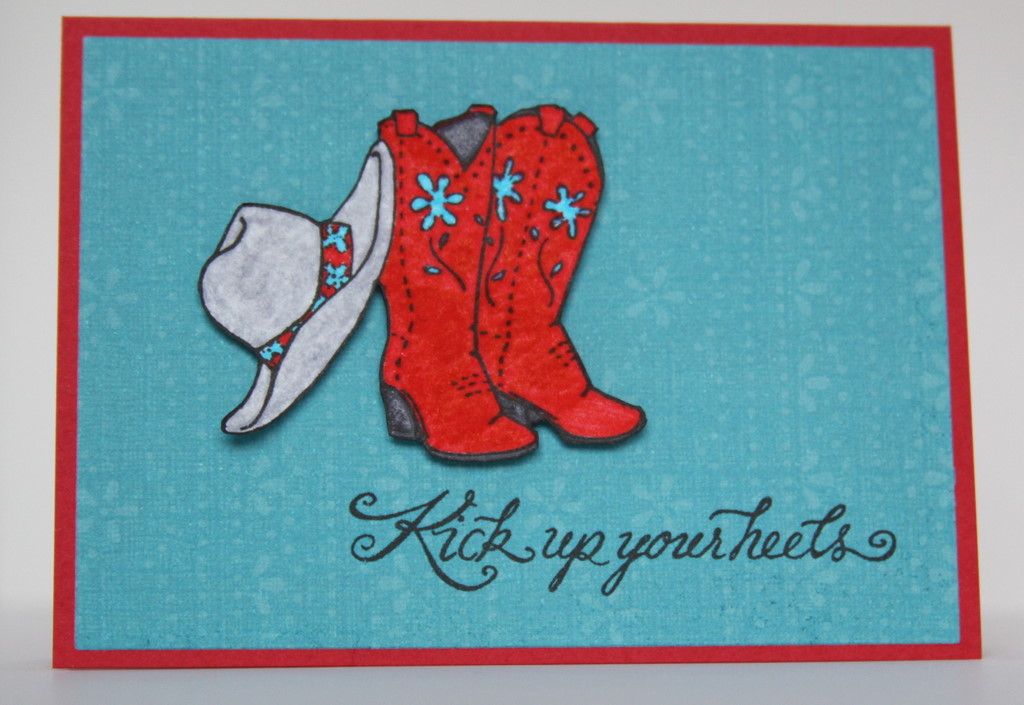


Challenge: Trash Cancer - use an item to represent each letter in the word TRASH.  
Here I used Teal/Turquoise color, Red, paper with applique background (?!), a sentiment and a hat!
Stamps: Great Impressions  Ink: Versafine, Tombow markers  Paper: K&Company  
Other: scissors to cut out image, foam tape to pop it up  : )


Challenge: Thanks Bunches - use masking to make a bunch of something
Stamps: River City Rubber Works-Tulip bunch topper (clear acrylic stamp), Unknown-pot with bow (red rubber on wood mount), Stampworkz Crafters Companion-sentiment  Ink: Versafine, Tombow markers  Other: Stamp-a-ma-jig, 
scrap & scissors to make a mask of the bunch of tulips

Ha, Good Golly, looking at this now, several months later, how did I do this?!  It was a challenge, and I only made one card, I remember that much!  Notice the flowers & pot are 2 separate stamps and 2 different types, one clear, the other not!  One pot with one collection of tulips apparently wasn't "a bunch" enough for me at the time, I must have been feeling creative that night!  Anything to add to a challenge for myself! : )


Challenge: Relationships matter - card representing this
Stamps: Great Impressions-image, Sweet n' Sassy Stamps-sentiment  Ink: Versafine, Tombow markers, 
Sakura Stardust pen  Other: CB-Baby's Breath EF, May Arts Ribbon


Challenge: Hearts for Hope- use 3 hearts and some red : )
Dies: Sweet n' Sassy Stamps-Bottom of my Heart,  Cuttlebug-Love Language sentiment, Diamonds in the rough EF


Challenge: Can I get a ride? - use image of mode a of transportation
Stamps: Great Impressions-bicycle, CTMH-sentiment  Ink: versafine, Tombow markers, 
Sakura Stardust pen (traced sentiment, accent flowers)  Paper: DCWV


Challenge: Food for the Body & Soul - something sweet!
Paper: Kathy Davis-Hello Sunshine   Stamp: SU Watercolor Words    Ink: Versamark  
Other: Moon Glow EP - 2 tone Midnight Sapphire & Obsidian, Foam tape (pop up extra cupcake)
I love the look of this 2 tone EP, straight on it looks black so had to angle it so you could see the beautiful blue!!  It really helps the sentiment pop on that busy paper!


Challenge: Light Days - use the ombre technique to make a background
Ink: SU Cameo Coral reinker  Paper: Watercolor, Shimmer for die cuts  
Dies: Memory Box - Waltzing Butterflies, Sketchbook Joy

Wet watercolor paper with water mister, spread with brush.  Drip reinker on acrylic block, use brush to add color to wet watercolor paper, starting at one end and spread back and forth working way down the page, allowing color to get lighter toward opposite end.


Challenge: Candy Striper Comfort - use red & white stripes
Paper: Penny Black-Madison, Silver shimmer paper (curly swirly)  Other: Taylored Expressions-Curly Swirlies die, 
Little Yellow Bicycle-Love die


Challenge: First class, no extra postage needed, bonus use postage like images
Stamps: Make an Impression-postage stamp, unknown maker of cube stamp of Christmas images  
Ink: Memento, Tombow markers, Versamark  
Other: Stamp-a-ma-jig (to place 4 postage images as close together as possible like a sheet of stamps), 
Sakura Stardust pen to accent images, Roller to apply layer of Versamark over whole thing, Clear EP for a nice shiny & sealing layer 

Whew!  Ok, maybe I should have split this up into a few parts.  This review makes me want to go play, but sadly, I think it's time to call it a night.  Besides, it's time for me to "move aaawaay from the computer"!  Break away from staring, unglue from my seat and back it up & out!  Good night!

Sunday, August 25, 2013

Cards

Here's a few cards I made back in July.


Using the above Sweet Stop sketch from July 6 I made the butterfly card below.  It was an experiment stamping the line image on the bold floral print.  As it is with experiments, sometimes when I look at it I like it, other times not so much. :)


Stamps: Sweet n' Sassy-Butterfly Flourish, Inkadinkado-Creative Words set    Ink: VersaFine Black   
Paper: ki memories, DCWV    Other:  Spellbinders-Wonky Rectangles die,   Cuttlebug EF-Cane Back Chair, 
Black EP,   Flowers-JoAnn's & Bazzillbasics, flower brad
_________________________________________________________________

Next, is the card I made for this Flourishes July Release Challenge - It's Sketchy  with this sketch and a window of any shape.  Most people made a window card (image stamped inside) so I went for something a little different, (more literal ?) using my new window dies from Memory Box!


Stamps: Sweet n' Sassy-Be Encouraged      Paper:  DCWV,  Vellum 
Ink: TH Distress Ink- Tea Dye (brick EF), Versafine-Vintage Sepia (sentiment)       
Other: Sizzix EF Brick Wall; Memory Box Dies-Small Madison Window, Small Flower Box, 
Fairytale Flower Border; MS Branch punch; Clear plastic- repurposed packaging; Stickles 

I inked the brick ef to help it show up on the patterned paper. You almost can't really tell what the original paper looked like now (it would be the embossed color tho it doesn't look quite the same) but I like the effect! Behind the window frame is pale yellow cardstock, then vellum, topped with clear plastic. Yes, cutting through all those layers to place it in the corner of the card was a pain!  The MB Fairytale Flower Border die was used with green, yellow & red cardstock.  The colored flowers were snipped & glued onto the green die cut, then the green cut apart and arranged in the flower box. I thought it would save me work to do it this way rather than use separate punches or other small dies, but I'm not so sure anymore! 
____________________________________________________________________

This next one is a wedding card for a gal at work.  Her favorite color is pink, followed by anything camo.  I really wanted to do something in pink camo but it didn't seem to work for me. Her girls wore pink dresses and her wedding bands have beautiful silver sparkle so for her card I went with pink & silver, simple style with alittle sparkle.


Stamps: Stampin'Up-Soft Swirls, Penny Black sentiment    Ink: Ranger Acrylic Paint dauber-Silver, Versafine-black, Versamark     Paper: echo park-Love Story pink    Other: Tim Holtz ideology Grunge Paper, Spellbinders Hearts die, eksucess corner rounder punch, Recollections Sparkle EP-Clear Silver, KaiserCraft-large pearl brad, 
pink flowers, Stickles, Offray ribbon

The heart was die cut from the grunge paper, (like light weight cardboard with a soft, velvety texture on one side) then coated with silver acrylic paint. I think coating that soft texture gives it some depth vs. using smooth cardboard. I added Stickles to the flowers & around the brad to add more sparkle.

Off to finish up another card!

Monday, June 11, 2012

Happy Anniversary Mom & Dad

I'm late, I'm late ... for a very important date!  What is that from, Alice in Wonderland?  I don't know why that line comes to me often, partly because I'm usually running late for something, most often in the card making department.  So, I wanted a quick card to send off in the mail for my folks Anniversary, despite it being a month ago, but figured I'd send it with the Mother's Day card (previous post), also a month late... Good Grief, it's almost Father's Day! : } Ok, something quick & easy...


I saw this paper in a mini pad made by Simple Stories - Generations theme, that I had picked up at my LSS awhile back.  A single sheet of paper with these rectangles of images & words that seemed so appropriate for my parents!  Can't get any simpler than that, tho I did have to cut off a row of 2 to make this card size.  

I didn't want to over embellish it or cover up any of the design but it needed something!  How about 3 rows of Jewelry cord on Scor-tape and a 4-loop bow, made with the help of a Bow-Easy, tied onto the center where the cords cross.  Hmmm, almost like a package!  I didn't wrap the cord around the paper because of the bulk but left them raw at the edges of the print paper, kind of different and nice & flat!  I used one of JustRite's Mini Sentiments to stamp Happy Anniversary in the lower right image, (how convenient to have that blank space) and added 2 punched hearts in the upper right area.


Since I used a full sheet of solid green from a small 5x6 pad as the mat, I didn't want to dig around to find a sheet big enough to use or to cut as the base so the mat became the base for the front flap of the card.  The back flap of the card has a 3/4" overlap glued to the inside of the front flap.  I then used coordinating paper to cover-up that overlap to dress it up a bit.  


To take up some of the blank space on the inside, I used the Twirled Heard die from Memory Box.  There was an extra full heart left in the length of the chain, just right to glue on the left.   Yikes, who forgets to take a picture before signing the card!  Sorry about the little wedge scrap pieces in the pic to cover up the writing. I was just so happy to have it done so I could mail it, sometime soon...! : )

Stamps: ODBD - Love 1Cor 13, JustRite - Mini Sentiment - Happy Anniversary (outside, Stampendous - Happy Anniversary (inside)
Paper: Simple Stories - Generations, DCWV
Ink: TH Distress, VersaFine (love verse)
Other: Memory Box-Twirled Hearts die, Fiskars-Heart punch,  Hemp Jewelry Cord (JoAnns), Scor-tape 1/8", Bow-Easy

Happy Anniversary Mom & Dad!  Thanks for being mine! : )

Friday, May 18, 2012

Mom's Day cards!

Happy Mother's Day Mom!  Sorry, they're a week late, actually they'll be later by the time they get in the mail.... :}

These are a couple of the Great Impressions monthly stamps from last month and I used the image layout of the roses and script from one of their sample cards.  Stamp the roses on cardstock and on scrap, cut out scrap image closely, adhere to image on the cardstock and over-stamp with script stamp until height (length) desired.  The script is stamped 3 times on both of these cards.


The script reads, " God created the rose in the likeness of a woman.  The rose represents beauty.  The stem represents strength. Petals are soft as her delicate skin. The fragrance is pure and so sweet.  Leaves represent arms outstretched, always giving.  Each time you look at this rose remember ... God made you special. "  I thought these stamps were beautiful and appropriate for a Mom's day card!  


To dress up the inside a bit, the roses are stamped 2nd generation to lighten the gray a bit.

Stamps: Great Impressions
Ink: Memento-Images, TH Distress-sponging; Prism Colored Pencils
Paper: K&Company-green x-pattern (red roses), Kaisercraft-green & pink pattern paper framing the image (pink roses)
Other: Red rose card-Martha Stewart large leafy border punch; Pink card-Memory Box-Catalina Wreath die (pink card, wreath cut in 2 and draped over top half, kinda gives it a heart shape look), Blue Moon-heart trinket, JoAnns-ribbon