Friday, October 29, 2010

First Snow


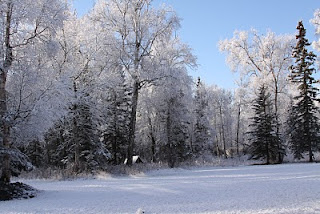
Look what I awoke to this morning!!!

Last night I flew home from Iowa after a great visit with family. It was still fall in Iowa, just cooling off into the 40-50 degree range when I left. Here in Alaska it was beyond fall, as I was going to be reminded, while driving home in the dark, experiencing rain then snow, in barely above freezing temperatures.

In Iowa -

My folks still had Marigolds


and Mums galore!


This cute little gal lived among them all.

And this -

This is what I have! Welcome home to Alaska!


Posted by Picasa

Sunday, October 10, 2010

Big Toy fun


Scott got a "new for him" toy for his birthday today, and any other holiday we can think of for the next few years.


It should come in handy, tho with winter right around the corner it may not be used much till next spring or summer. Right now he's making piles, and a mess..... "It's alittle small but it'll do the job" he says. Hmmmm.... I'll have to think on a list of projects for this hummer... : )


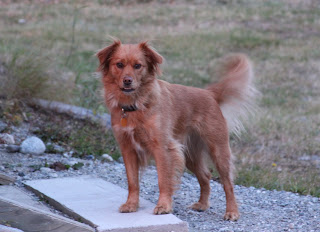
Sissy...she says "enough of that thang, I'm hungry let's go in already!" I agree. Scott's off to Washington tomorrow and I'm off to Iowa in a few days!!

Posted by Picasa

SNTODBD19 Don't worry

The Our Daily Bread Designs Stamping In Time: On Assignment Challenge 19 (SNTODBD19) for this week is a movement theme. "You can choose movement via techniques and images that give the look of movement or create a card with actual movement. Some card ideas would be the Twist, waterfall, Surprise Pop up, T-slide, and Suspension cards to name a few. Also, for images, think butterflies, birds, cars, people...etc, that give the look of movement or motion."

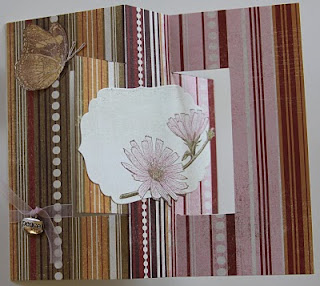
I haven't attempted any of the card styles with movement before so I checked out the tutorials over at Splitcoaststampers in their resource area. The Swing or flip-flop card seemed quick and the instructions easy to follow. Here's my attempt.

Card Front


Opening...


The "inside" panel has white space to write a personal message.

This was a fun card to make. I'm sure it won't be the last for me of this style! Notes for next time: If not using heavy double sided paper, glue sheets together BEFORE making the card. Nothing like trying to join two separate (imperfect) cards (their sides, folds, window) together to make one...ugh!

Stamps: Our Daily Bread Designs-Don't Worry Ink: VersaFine-Vintage Sepia Paper: BoBunny Other: Tombow markers, Prismacolor pencils, Sakura Stardust pen, Spellbinders Labels 4, ribbon, charm
Posted by Picasa

Wednesday, October 6, 2010

Fall Stamping decor JRC_038

The JustRite Friday Challenge #038 for this week, sponsored by Copic, is to make a fun Fall holiday 3D project! "This could be Halloween treats, Fall decorations, Thanksgiving table decorations, etc. using your JustRite stamps." At first I wasn't even going to try to participate. What? Make something other than a card, Me?! Sounds like alot of work! My hubby is home for a week so I really didn't want to get all wrapped up in a "project". But, as a few days went by, I thought, why not at least try to think about it, but no pressure?! Well, as I ate my yogurt yesterday I came up with this idea : )

I remember having a little vase of silk flowers in my room when I was growing up and I remember making several crafty pencil holders way back then too. Looking at my yogurt cup I thought what a great size for holding pencils, paintbrushes, and flowers. It seemed like a quick and easy way to make some seasonal decor, not to mention a great way to recycle!


After cleaning the container (of course, tho it still smells fruity), I used copy paper to make a pattern of the Yoplait yogurt cup and to cover it as a base layer to help hide the bold label. You could probably use acrylic paint as a base layer but I didn't want to go looking for any late last night. I then covered it with scrapbook paper. The cardstock I used for the image was alittle heavy to just tape on so I poked holes into the container with an exacto knife and used to brads to help secure it to the cup. I finished it off with ribbon at the top and bottom to cover the paper edges.

Stamps: Just Rite-Autumn Blessings Ink: VersaFine-Vintage Sepia, Tombow markers
Paper: DCWV Other: Spellbinders Classic ovals, Yoplait yogurt cup, Ribbon, brads
__________________________________________

Another quick & easy project I thought of was the place setting cards I've seen others make for the holidays. Here's 2 that I did up.


The names were stamped using the Just Rite Curlz 50pt Font and gold embossed. The leaf embellishments were an afterthought to help cover up a booboo on Scott's : )

Stamps: Just Rite-Autumn Blessings, Curlz 50pt font Ink: VersaFine-Vintage Sepia, Tombow markers Paper: DCWV Other: Spellbinders Classic ovals, Scalloped ovals; Gold Detail Embossing Powder, Ribbon, Leaf embellishments-Favorite Findings (button section of JoAnns)
Posted by Picasa

Sunday, October 3, 2010

ODBDSLC31 Wing It - God's Peace

This week's Shining Light Challenge 31 over at the Our Daily Bread Design Blog is to "Wing It". "Include anything with wings on your creations...this can be birds, angels, butterflies, bugs, etc. It need not be your image...it can be embellishments or on your paper." I couldn't wait to break out another new set for me, Don't Worry to make something for this challenge!


I stamped the Chicory flower twice, colored with Tombow markers and carefully cut them out to be able to arrange them as desired. The butterfly is colored with the same blue marker but in layers to slightly darken the color. I then used the Clear Stardust pen to add some sparkle on the butterfly and some dimension on the centers of the flowers! I love that pen! : ) The patterned paper behind the sentiment and the top portion of the card has tiny glitter dots on it so I added a stripe of Stickles to the faux ribbon on the paper for more sparkle and to tie it all together.

I love this paper from DCWV - Garden Party stack. The stripe paper and doily are part of the lighter background paper. For this card I thought the light top part needed a dark border also. To add the dark background frame around the top portion of the card, I cut the dark paper the same width as the lighter paper, then I cut in 1/8" from the edge on both sides of the lighter paper, from the top just down to the faux ribbon/stitching line. I really like the result here!

Stamps-ODBD Don't Worry, Peace (sentiment) Ink: Versafine-Vintage Sepia
Paper: DCWV-Garden Party Other: Tombow markers, Sakura Stardust pen-clear, Spellbinders-Labels 4, Stickles-Cinnamon, foam tape
Posted by Picasa