Wednesday, November 24, 2010

Glimmer & Poinsettias ODBDSLC38


This week's Shining Light Challenge 38 over at Our Daily Bread Designs Blog is to create a holiday card, for any holiday. Tis the season for me to dive into making Christmas cards so this only helped to motivate me to get busy. Here's a few variations using the same stamps from the Blessed Christmas set from ODBD.


I love this Holly Ribbon embossing folder, especially combined with Pearl Glimmer Mist (sprayed after embossing). Wow, what a glimmer! I used my favorite Sakura Clear Stardust pen on the poinsettias to spread that shimmer.


I sponged Antique Linen Distress ink on the embossing before spraying the glimmer mist on this card. You can't see that shimmer but the flower really stands out from that stardust pen!

Happy Thanksgiving!

Stamps: ODBD Blessed Christmas Ink: VersaFine Vintage Sepia, TH Distress Ink-Antique Linen Other: Spellbinders labels4, Ribbon Tag Trio; Cuttlebug EF Holly Ribbon, Tattered Angels Glimmer Mist-Pearl, Sakura Clear Stardust pen, Tombow Markers, Ribbon

Posted by Picasa

Friday, November 19, 2010

Thanksgiving cards

The celebrated Thanksgiving Day, a day to gather with family & friends to eat (what we do best together) and share what we're thankful for or the commercial interpretation - day of feasting in preparation for the big shopping weekend, is fast approaching! My hubby is working thru that Saturday following so we will have our little feast a few days later. That means I'll be able to relax and do my own thing that day! Well, I have been invited to a neighbors' so I still have the option to feast. : )


I just finished up some cards that I'm gonna send out in thanksgiving for my family. I had colored these images about this time last year but by the time I finished, the task of matching them up with paper was too overwhelming for me to get them finished for last Thanksgiving. (I HAD to color them all different!) You may recognize a few from previous posts and entries into ODBD challenges but most of them were done these last couple of weeks while Scott was home. (Verse was just added to 2 of the cards posted earlier - the card above and the Orange card on the right below.)


Just like I varied the colors in the image, I tried to vary the style of the card at least slightly tho they still are very similar. They are the standard 5 1/2 x 4 1/4 (or close to it except the first card) for easy mailing so not too much room for variation. I have a hard time making exactduplicates anyway, too many options, too many colors, and I only made less than a dozen (unlike Christmas cards) so why not play!


Some of them were colored with markers (Tombow and Adirondack) and some were colored with Prismacolor pencils. I had lots of practice with layering colors while doing these.


This is a great image to use the out-of-the box die cutting technique. Simple cloth image to cut around : ) I like how the cloth part kinda pops up at you naturally, there's no foam tape under it tho I considered putting some there anyway since I'm mailing it out. Hmm, those grapes almost glow on the left-hand card.


This Bible verse is part of the Fruit of the Spirit stamp set from Our Daily Bread Designs. I had won the fruit bowl image thru the "Whose stamp is it anyway?" competition in Scrap&Stamp Arts magazine last year so I don't have the set. Since I liked the verse with this image, I picked 4 of my favorite fonts to print it out in Word (or Publisher).

Whew, I'm glad these are done! Off to get these ready for the mail! Then on to making Christmas cards. : ) I hope everyone had a wonderful Thanksgiving Day and remember to be thankful every day (without the additional calories)!! : )

Stamps: Our Daily Bread Designs-Fruit of the Spirit Ink: Versafine Black Onyx, Tim Holtz Distress inks-Antique Linen, Tea, Brick
Paper: DCWV Other: Markers-Tombow, Adirondack; Prismacolor Pencils, Spellbinders- Classic Ovals, Sm. Scalloped ovals, Labels 4; Cuttlebug EF- D'vine Swirl, Textile; Sakura Clear Stardust pen, DMC Metallic Gold floss, Foam tape, Ribbon

Posted by Picasa

Friday, November 5, 2010

Ribbons on colors

The Stamping in Time: On Assignment Challenge 21 at Our Daily Bread Designs Blog is to use our favorite embellishment, and to make it obvious as to which is our favorite, since it is so hard to use just one embellishment on a card, let alone pick one favorite!

I love ribbon!! I don't use it on anything but cards but I'm attracted to the many colors, styles and sizes of ribbon. When the craft stores break out the holiday ribbon, I can't resist checking it out, what new colors and designs this year?!! Last month I bought this sheer red ribbon with sunflowers printed on it. It's pretty wide and has wire but I don't let that deter me. It works great as a background, after removing the wire.


Since this is sheer ribbon I put a strip of colored paper behind it. In this first card I used red paper; it brightens the red and deepens the green of the leaves in the print.


Here is the same card but with green paper instead of red. The strip of green paper behind the sheer red ribbon deepens the red and brightens the green of the leaves on the print. It also makes the other ribbon look awfully orange here. It's actually more of a copper color and matches the glittery edging on the sheer red ribbon, but you can't tell that from this pic, grrrrr.

Glitter or other shimmery embellishments are also a favorite of mine. These ribbons happen to have some glitter and shimmer to it. I carried it over to the paper by using some glitter glue. Hmmm, is it still obvious that Ribbon is my favorite here tho?!

This is one of my favorite verses - Don't ask me to pick ONE of those!! It also happens to be the verse Becca Feeken chose to be in the Scripture 4 set at ODBD. I was thinking of and praying for Becca and her family as I made these cards. Becca is pretty well known in rubberstamping blog land, being a part of many design teams for stamp craft companies and with her blog - Amazing Paper Grace. Her husband recently passed away. Tho we celebrate that he is home with our Lord with no more struggles, illness or pain, I pray for strength and courage for Becca and her family as they adjust to his physical absence in their daily life. This makes me think of the Matthew West song "Save a Place for me".

Stamps: ODBD-Scripture 4 Ink: Versafine-Vintage Sepia, TH Distress Ink-Brick Red (sponging) Paper: Prima Marketing, DCWV Other: Spellbinders-Classic Ovals, Big Scallops; Autumn Ribbon-JoAnns; Stickles

Posted by Picasa

Wednesday, November 3, 2010

ODBDSLC35 Dies and Punches

The Shining Light Challenge this week over at Our Daily Bread Designs Blog is to choose one of their top 3 challenges to make a card with. I chose "Dies or Punches" though I used both on my card. I had some new punches that I couldn't wait to use knowing they'd go well with some die cut flowers I wanted to make!


I just came home from spending a few weeks with my folks in Iowa. My Mom is a big crafter and stamper, one who played a big roll in my addiction with rubber stamps & card making : ) While there, she had me making scrunchy flowers with her Dahlia flower dies. I had only read of the technique and never tried it before. Nothing like getting together with another stamper to get motivated to try new things!!

I had to try making them with my Blossoms 2 dies now that I'm home. To age/distress/darken the red cardstock, I stamped it with the Amazing Grace Hymn stamp before using the dies then I sponged more ink around the edges before assembling the flowers. It's not as easy to "scrunch" cardstock versus copy paper weight or tissue paper, they're a little stiff but it gives them a different look. Gold Stickles were added to the centers to add some sparkle.


Rather than layer the Labels 4 die cuts with the verse, I made a frame using 2 dies to put around the verse that was stamped directly onto the designer paper base. I really like the light pattern on the paper for this card and had fun putting it all together.

Stamps: ODBD - Scripture collection 4, Amazing Grace Hymn
Ink: TH Distress Ink-Frayed Burlap (flowers, edging), VersaFine Vintage Sepia (verse)
Other: Spellbinders Labels 4, Blossoms 2; Martha Stewart Arch Lattice, Leafy vine punch ; Gold Stickles, Pop dots

Posted by Picasa

Friday, October 29, 2010

First Snow


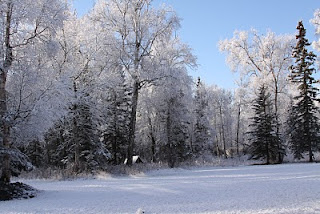
Look what I awoke to this morning!!!

Last night I flew home from Iowa after a great visit with family. It was still fall in Iowa, just cooling off into the 40-50 degree range when I left. Here in Alaska it was beyond fall, as I was going to be reminded, while driving home in the dark, experiencing rain then snow, in barely above freezing temperatures.

In Iowa -

My folks still had Marigolds


and Mums galore!


This cute little gal lived among them all.

And this -

This is what I have! Welcome home to Alaska!


Posted by Picasa

Sunday, October 10, 2010

Big Toy fun


Scott got a "new for him" toy for his birthday today, and any other holiday we can think of for the next few years.


It should come in handy, tho with winter right around the corner it may not be used much till next spring or summer. Right now he's making piles, and a mess..... "It's alittle small but it'll do the job" he says. Hmmmm.... I'll have to think on a list of projects for this hummer... : )


Sissy...she says "enough of that thang, I'm hungry let's go in already!" I agree. Scott's off to Washington tomorrow and I'm off to Iowa in a few days!!

Posted by Picasa

SNTODBD19 Don't worry

The Our Daily Bread Designs Stamping In Time: On Assignment Challenge 19 (SNTODBD19) for this week is a movement theme. "You can choose movement via techniques and images that give the look of movement or create a card with actual movement. Some card ideas would be the Twist, waterfall, Surprise Pop up, T-slide, and Suspension cards to name a few. Also, for images, think butterflies, birds, cars, people...etc, that give the look of movement or motion."

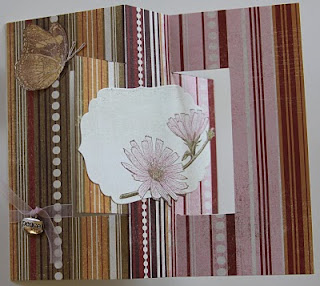
I haven't attempted any of the card styles with movement before so I checked out the tutorials over at Splitcoaststampers in their resource area. The Swing or flip-flop card seemed quick and the instructions easy to follow. Here's my attempt.

Card Front


Opening...


The "inside" panel has white space to write a personal message.

This was a fun card to make. I'm sure it won't be the last for me of this style! Notes for next time: If not using heavy double sided paper, glue sheets together BEFORE making the card. Nothing like trying to join two separate (imperfect) cards (their sides, folds, window) together to make one...ugh!

Stamps: Our Daily Bread Designs-Don't Worry Ink: VersaFine-Vintage Sepia Paper: BoBunny Other: Tombow markers, Prismacolor pencils, Sakura Stardust pen, Spellbinders Labels 4, ribbon, charm
Posted by Picasa

Wednesday, October 6, 2010

Fall Stamping decor JRC_038

The JustRite Friday Challenge #038 for this week, sponsored by Copic, is to make a fun Fall holiday 3D project! "This could be Halloween treats, Fall decorations, Thanksgiving table decorations, etc. using your JustRite stamps." At first I wasn't even going to try to participate. What? Make something other than a card, Me?! Sounds like alot of work! My hubby is home for a week so I really didn't want to get all wrapped up in a "project". But, as a few days went by, I thought, why not at least try to think about it, but no pressure?! Well, as I ate my yogurt yesterday I came up with this idea : )

I remember having a little vase of silk flowers in my room when I was growing up and I remember making several crafty pencil holders way back then too. Looking at my yogurt cup I thought what a great size for holding pencils, paintbrushes, and flowers. It seemed like a quick and easy way to make some seasonal decor, not to mention a great way to recycle!


After cleaning the container (of course, tho it still smells fruity), I used copy paper to make a pattern of the Yoplait yogurt cup and to cover it as a base layer to help hide the bold label. You could probably use acrylic paint as a base layer but I didn't want to go looking for any late last night. I then covered it with scrapbook paper. The cardstock I used for the image was alittle heavy to just tape on so I poked holes into the container with an exacto knife and used to brads to help secure it to the cup. I finished it off with ribbon at the top and bottom to cover the paper edges.

Stamps: Just Rite-Autumn Blessings Ink: VersaFine-Vintage Sepia, Tombow markers
Paper: DCWV Other: Spellbinders Classic ovals, Yoplait yogurt cup, Ribbon, brads
__________________________________________

Another quick & easy project I thought of was the place setting cards I've seen others make for the holidays. Here's 2 that I did up.


The names were stamped using the Just Rite Curlz 50pt Font and gold embossed. The leaf embellishments were an afterthought to help cover up a booboo on Scott's : )

Stamps: Just Rite-Autumn Blessings, Curlz 50pt font Ink: VersaFine-Vintage Sepia, Tombow markers Paper: DCWV Other: Spellbinders Classic ovals, Scalloped ovals; Gold Detail Embossing Powder, Ribbon, Leaf embellishments-Favorite Findings (button section of JoAnns)

Posted by Picasa

Sunday, October 3, 2010

ODBDSLC31 Wing It - God's Peace

This week's Shining Light Challenge 31 over at the Our Daily Bread Design Blog is to "Wing It". "Include anything with wings on your creations...this can be birds, angels, butterflies, bugs, etc. It need not be your image...it can be embellishments or on your paper." I couldn't wait to break out another new set for me, Don't Worry to make something for this challenge!


I stamped the Chicory flower twice, colored with Tombow markers and carefully cut them out to be able to arrange them as desired. The butterfly is colored with the same blue marker but in layers to slightly darken the color. I then used the Clear Stardust pen to add some sparkle on the butterfly and some dimension on the centers of the flowers! I love that pen! : ) The patterned paper behind the sentiment and the top portion of the card has tiny glitter dots on it so I added a stripe of Stickles to the faux ribbon on the paper for more sparkle and to tie it all together.

I love this paper from DCWV - Garden Party stack. The stripe paper and doily are part of the lighter background paper. For this card I thought the light top part needed a dark border also. To add the dark background frame around the top portion of the card, I cut the dark paper the same width as the lighter paper, then I cut in 1/8" from the edge on both sides of the lighter paper, from the top just down to the faux ribbon/stitching line. I really like the result here!

Stamps-ODBD Don't Worry, Peace (sentiment) Ink: Versafine-Vintage Sepia
Paper: DCWV-Garden Party Other: Tombow markers, Sakura Stardust pen-clear, Spellbinders-Labels 4, Stickles-Cinnamon, foam tape
Posted by Picasa

Saturday, September 25, 2010

Starving Artistamps blog candy & RSC challenge

Starving Artistamps is having some special blog candy giveaways this month in celebration of some new releases and of Tracey's Birthday. I'm alittle late joining in here, already week three, but Congrats to Tracey and Starving Artistamps!! The details for this week's blog candy and the new releases can be found here!

To add to their fun month of celebrations, Starving Artistamps is also hosting the September Sketch Challenge over at Rubber Stamp Chat. I'd show the sketch Tracey posted but the image is too big to display here so you will just have to visit her post on RSC linked above to view it and her card!

Some of my favorite stamps from Starving Artistamps are their flowers, butterflies and the mosaic backgrounds. Combining some of these with their sketch at RSC and their Mosaic Grout instructions, this is what I came up with. It ended up being a bit bigger than expected, I even used one of the MINI mosaic backgrounds thinking it would help me keep the finished size down but oh well! Paper fun!


The butterflies were colored with metallic gel pens and the petals on the daisy were highlighted with Stickles. The green paper was embossed and lightly sanded before cut into the strips. The flowers and butterflies are popped up with foam tape.


When I started this card, the colors made me think of fall here, but we've had some pretty strong winds the past couple of days (70+mph) so most of the leaves, and a few trees, have blown down. Fall doesn't stick around for long here in AK, but I can still enjoy the colors using my papers and ink!

Stamps: Starving Artistamps- Mini Retro Grout, Leaf, Med. Daisy, Sm. Freak Butterfly
Inks: Colorbox Chalk ink-Deep Green, Fresco-Giovanni's Garden (green), VersaMagic-Sage Paper: DCWV
Other: Cuttlebug EF-Textile, sandpaper, Sakura metallic pens, Stickles, Quickie glue pen, foam tape

Posted by Picasa

Tuesday, September 21, 2010

ODBDSLC30 White & Bright Christmas

This week's ODBD Shining Light Challenge at Our Daily Bread is to make it White & Bright. Use all white except for the stamped image and embellishments. (no designer paper unless it's all white.) What fun! Great time to break into my new ODBD stamps!


I stamped the Poinsettia image on plain white paper and again on Red Shimmer paper (from JoAnns). The white image was loosely trimmed but the red flower was closely trimmed to use for layering (after it dried overnight). The vine and leaves were colored with colored pencils then with a Green Glaze pen from Sakura. The flower (white) was colored with a Red Tombow marker.

To help make the image pop and 3D it, I used an xacto knife to partially cut out the inner petals of the red flower on the shimmer paper then curled them under. After touching up the edges with a black marker, I layered it on the main image using foam tape then used Yellow Stickles in the center of it. A green metallic pen was used for the vine (image) that curled onto the red petals. I tried doing without this green but leaving the vine curls red on the red petals looked kinda funny, more so than the green curls do now. Just now we know that the curls are part of the vine. : )


The image is layered on top of a textured background and the sentiment is also layered on but using foam tape. All this is to help it pop and not look flat when using white on white. I love the effect and that deep red of the shimmer paper, tho you may not see the shimmer here! Thanks for looking! : )

Stamps: ODBD-Luke 2:11 set Ink: VersaFine-Black Onyx
Other: Spellbinders-Labels 4, Fancy Tags; Cuttlebug Emb Folder-Victoria; Prismacolor pencils, Sakura Glaze pen, metallic pen; Stickles-Yellow; foam tape

Posted by Picasa

Sunday, September 19, 2010

JustRite Friday Challenge JRC_036

JustRite Friday Challenge 036: Color Challenge

This week's JustRite Friday Challenge #036 is to use this color combination -- dark red, ivory & black, with the added twist of creating your own handmade embellishment. This can be a die cut or crocheted flower/shape, handmade felt embellishment, decorated paperclip or clothespin to add to your project, or any other type of embellishment!

JRC_036_ColorChallenge2

I'm having fun with these challenges, as you can probably tell : ) Looking at my growing collection of JustRite Stamps, I knew Christmas seemed to be the theme for September so I thought I'd try to stick with that. Keep this up and I'll have a good start on my Christmas cards!!
I wanted to use Black for more than just the ink, tho black isn't a color I usually have in mind for Christmas cards so this took some thinking. I tried whatever came to mind in an effort to not over think this (otherwise nothing gets done!). I've seen some great work with layers using Spellbinders dies done by lots of other creative gals, so that gave me some ideas to start with.


The JustRite stamps go hand in hand with Spellbinders nesties! Tho I stamped the words and the black lacy type border as one, I used several different dies to cut them apart and layer them. The lacy border was cut by hand with scissors so I could use another layer below it without making it all any wider for the card front. (The Christmas embossed background can be better seen in the next card I made.) Then to MAKE the embellishment, ugh, I left that for another evening. I experimented with the Blossoms 2 dies (and glitter glue) and made a few flowers to play with. I wasn't too unhappy with this for my first try. : }


I've learned to stamp several images of the same thing at one time to play with different ideas, if I have time, but mostly to have a backup just in case I really don't like the outcome of any experimenting I do with one. Here is another card using the same stamps, dies, punch, background, color theme but different layout and order of colors.


Stamps: JustRite Christmas Treasures Set Ink: Versafine Onyx Black, SU Craft White
Accessories: Spellbinders Classic Circles, Big Scallop Circle, Blossoms 2; Cuttlebug EF-Season's Greetings; Martha Stewart Edger-Doily Lace, Holly Leaf punch, Branch punch; Ribbon, Black brad, Stickles-Diamond, foam tape
Posted by Picasa

Tuesday, September 14, 2010

SNTODBD17 Amazing Grace


The Stamping in Time 17 technique challenge over at Our Daily Bread is Emboss Resist. I haven't used a resist technique in a long time so I didn't want to pass up this inspiring challenge. Two types of resist were used on this card. The flowers were stamped using Versamark on regular paper (110lb) and embossed with White Detail powder. I know Dogwoods don't usually have much color but to make them show up, since I used white powder on white paper, I couldn't resist coloring them. I also traced outside the embossing to help the image pop.


The words to Amazing Grace were stamped using Clear Resist Ink on white glossy paper. Ink was sponged on, making the words pop thru.

I'm having fun playing here but I really need to get out to enjoy the beautiful sunny day. They have been a rare occurance this past summer and now we are into fall here in AK. It's in the 60s and clear so a great day for the dog and I to go for a hike. Hope everyone has a joyous day! : )

Stamps: Our Daily Bread Designs-Amazing Grace, Grow in Grace
Ink: Ranger Clear Resist Ink, Versamark, Kaleidacolor-Fresh Green, Tombow markers
Accessories: Ranger White Detail Embossing Powder, Martha Stewart Edger-Doily Lace, Ribbon, Blue Moon (?) Charm (Walmart/JoAnns)

Posted by Picasa

Saturday, September 11, 2010

Mojo Monday 155


Boy, I'm on a roll! This is the last card I made this week, before Scott headed off hunting today. I've always wanted to play with the Mojo Monday sketches but haven't taken the time until now.


Friday we went into Anchorage and stopped at JoAnns (among other places). I purchases 3 pads of the DCWV paper that were on sale for $9.99! The papers I used on this card are from the Cafe Mediterranean stack. I love the bright colors and the embossed flowers in this stack, but I finally settled on these 2 sheets for this card. The pics were taken last night, low light, even with flash, ugh! I tried taking them again today but too late, nice and bright light but bad shadows....so I stuck with the pics from last night, no weird shadows here.


I went with the oval here for this image tho the sketch was for a circle. I just couldn't see using a circle with this, or covering it up with the ribbon, but I really wanted to use it anyway! This is one of my favorite stamps and it's an old one from Great Impressions.

Stamps: Great Impressions-Milkcan with flowers, Hero Arts-sentiment
Ink: Versafine Vintage Sepia
Paper: Die Cuts With A View (DCWV)-Cafe Mediterranean, DCWV textured cs
Accessories: Spellbinders Classic Ovals, Classic Scalloped Ovals; McGill Tag punch, Prismacolor Pencils, Ribbon, foam tape

Happy Weekend!!
Posted by Picasa